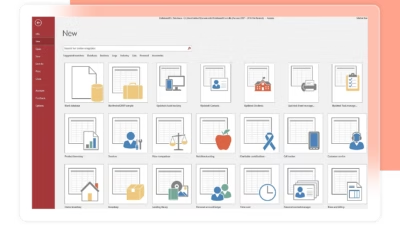
Microsoft OneNote is a digital notebook that’s flexible enough for students, teachers, professionals, and entire teams. But to truly benefit from OneNote, it’s essential to structure your notebook clearly—so content stays organized, easy to find, and usable over time.
Whether you’re using OneNote in school or in a professional environment, this guide offers practical tips to create an effective and scalable structure.
Why OneNote is ideal for structured note-taking
- Works across all devices (desktop, web, mobile)
- Supports text, images, handwriting, audio, files, and links
- Allows real-time collaboration
- Organizes notes with Notebooks > Sections > Pages
- Syncs automatically via OneDrive or SharePoint
With the right setup, OneNote becomes your centralized hub for learning, planning, tracking, and knowledge sharing.
Tip 1: Use one notebook per purpose or subject
Avoid putting everything in one huge notebook. Instead, create separate notebooks for each major area.
Examples:
- 🏫 School: One notebook per subject (Math, History, Science)
- 💼 Business: One notebook per project, department, or role (e.g. “Marketing Hub”, “Client A”, “Sales Notes”)
This keeps your data modular and easy to share.
Tip 2: Use sections to group related content
Sections are like folders. Use them to group content by category, topic, or time period.
In a school context:
- Lessons
- Homework
- Study notes
- Exam prep
In a work context:
- Meeting notes
- Project plans
- Client communication
- Reference materials
💡 You can also use Section Groups for more depth (e.g. a “2025” group with sections per quarter).
Tip 3: Use one page per session, idea, or item
Pages are where the actual content lives. Avoid long, endless pages—break your content into logical chunks.
Examples:
- One page per meeting
- One page per lecture or topic
- One page per task or checklist
- One page per design draft or brainstorm
Use page titles clearly (e.g. “2025-03-15 – Kickoff Meeting”) for easier search and navigation.
Tip 4: Use consistent formatting and templates
Consistency improves readability.
- Start every page with a header and date
- Use headings, bullet points, and highlights
- Create and reuse custom templates for recurring formats (e.g. meeting notes, reports, class summaries)
This makes your notebook feel more like a structured knowledge base.
Tip 5: Color-code and tag your content
- Color your sections for visual clarity (e.g. red for urgent, blue for planning)
- Use tags to mark action items, questions, important points
- Later, search by tag (e.g. find all pages with “To-do”)
This makes navigation and filtering much easier.
Tip 6: Embed files, images, links, and audio notes
OneNote supports rich content:
- Attach PDFs, spreadsheets, or images
- Insert links to SharePoint, Teams, or web pages
- Record and embed audio notes for quick reflections or reminders
Especially useful for teachers, students, consultants, and project managers.
Tip 7: Collaborate in shared notebooks
For teams or class groups:
- Store shared notebooks in SharePoint or OneDrive for Business
- Grant view or edit access to selected users
- Use version history to recover lost or overwritten notes
- Pin notebooks in Microsoft Teams channels for fast access
Tip 8: Use notebook search and recent edits
Don’t waste time scrolling.
- Use the Search bar to find any keyword across notebooks
- Use the Recent Edits feature to jump to new changes (View > Recent Edits)
- Create a Table of Contents page with links to key sections
Summary
With a clear structure—Notebook > Sections > Pages—OneNote becomes a powerful, organized, and long-term tool for both education and business. The key is consistency, clarity, and a bit of creative formatting.